Positions
Every position on the mat, grouped the way you’ll meet them. Each one shows how to play it, where you can move next and the techniques that start there. Open a position for its full lesson.
Closed & half guard 7
Closed guard
Your legs are locked around their waist. Break their posture, then attack, sweep or take the back.7 moves · 19 techniquesOpen lessonQuick guide for Closed guard
Your legs are locked around their waist. Break their posture, then attack, sweep or take the back.
- Break their posture so their head comes below their hips
- Control an arm and their head
- Angle off to attack: sweeps, armbars, triangles, the back
- Pull with your legs, not just your arms
- Never stay flat: angle your hips off to the side
If they sit back on their heels with hands on your belt → Pull with your knees first, then pull their collar or head down
 Scissor sweepSweep · Closed guard · FundamentalFrom Closed guard → Mount (Tate Shiho Gatame)Chewjitsu · Stephan Kesting · Roger Gracie
 Hip bump sweepSweep · Closed guard · FundamentalFrom Closed guard → Mount (Tate Shiho Gatame)Chewjitsu · Stephan Kesting · John Danaher
 Flower (pendulum) sweepSweep · Closed guard · FundamentalFrom Closed guard → Mount (Tate Shiho Gatame)Stephan Kesting · Roger Gracie · Chewjitsu
 Omoplata sweepSweep · Closed guard · IntermediateFrom Closed guard, Rubber guard, Spider guard +1 → Side control (Yoko Shiho Gatame)Stephan Kesting · Lachlan Giles
 Triangle (Sankaku Jime)Submission · Choke · FundamentalFrom Closed guard, Knee shield / Z-guard, Spider guard +5Stephan Kesting · Lachlan Giles · John Danaher · Ryan Hall
 GuillotineSubmission · Choke · FundamentalFrom Closed guard, Butterfly guard, Half guard +4Marcelo Garcia · John Danaher · Chewjitsu · André Galvão
 Armbar (Juji Gatame)Submission · Armlock · FundamentalFrom Closed guard, Mount (Tate Shiho Gatame), Knee on belly +4Stephan Kesting · Chewjitsu · Roger Gracie · Rener Gracie
 Kimura (Gyaku Ude Garami)Submission · Shoulder lock · FundamentalFrom Closed guard, Side control (Yoko Shiho Gatame), North-south (Kami Shiho Gatame) +5Stephan Kesting · John Danaher · Marcelo Garcia · Jason Scully · Tom DeBlass
 OmoplataSubmission · Shoulder lock · IntermediateFrom Closed guard, Rubber guard, Spider guard +4Stephan Kesting · Lachlan Giles
 TarikoplataSubmission · Shoulder lock · AdvancedFrom Closed guard, Side control (Yoko Shiho Gatame), Turtle (top)Lachlan Giles · Stephan Kesting
 Kimura trap back takePass or back take · Back take · IntermediateFrom Closed guard, Half guard, Side control (bottom) → Back controlStephan Kesting
 Arm drag to the back (guard)Pass or back take · Back take · FundamentalFrom Closed guard, Seated open guard, Butterfly guard → Back controlAndré Galvão · Stephan Kesting
 Mir lockSubmission · Shoulder lock · IntermediateFrom Closed guard, Side control (Yoko Shiho Gatame), Half guard
 Bicep slicerSubmission · Armlock · AdvancedFrom Closed guard, Mount (Tate Shiho Gatame), Side control (Yoko Shiho Gatame)
 Lumberjack sweepSweep · Closed guard · FundamentalFrom Closed guard → Mount (Tate Shiho Gatame)
 BaratoplataSubmission · Shoulder lock · AdvancedFrom Closed guard, Spider guard
 Cross choke (Juji Jime)Submission · Choke · Fundamental · GiFrom Mount (Tate Shiho Gatame), Closed guard, Knee on belly +1Roger Gracie · Stephan Kesting
 WristlockSubmission · Wrist lock · IntermediateFrom Side control (Yoko Shiho Gatame), Mount (Tate Shiho Gatame), Closed guardStephan Kesting · Rener Gracie
 Choi barSubmission · Armlock · AdvancedFrom Half guard, Knee shield / Z-guard, Closed guard
Half guard
You trap one of their legs between yours. Get an underhook and come up, or sweep.11 moves · 11 techniquesOpen lessonQuick guide for Half guard
You trap one of their legs between yours. Get an underhook and come up, or sweep.
- Get on your side facing them
- Win the underhook on the far side
- Come up to the dogfight, sweep or take the back
- The underhook battle decides half guard
- Being flat is losing; being on your side is playing
If they drive a crossface into your jaw → Frame on their neck, shrimp and pummel for the underhook
 Old school sweepSweep · Half guard · FundamentalFrom Half guard, Lockdown → Half guard (top)Lachlan Giles · Chewjitsu · Stephan Kesting
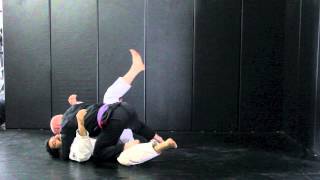 Electric chair sweepSweep · Half guard · IntermediateFrom Half guard, Lockdown → Half guard (top)Eddie Bravo · Lachlan Giles
 John Wayne sweep (knee lever)Sweep · Half guard · FundamentalFrom Half guard, Knee shield / Z-guard → Side control (Yoko Shiho Gatame)Lachlan GilesChoi barSubmission · Armlock · AdvancedFrom Half guard, Knee shield / Z-guard, Closed guard
 Tornado sweepSweep · Half guard · AdvancedFrom Half guard, Knee shield / Z-guard, Inverted guard → Side control (Yoko Shiho Gatame)GuillotineSubmission · Choke · FundamentalFrom Closed guard, Butterfly guard, Half guard +4Marcelo Garcia · John Danaher · Chewjitsu · André GalvãoKimura (Gyaku Ude Garami)Submission · Shoulder lock · FundamentalFrom Closed guard, Side control (Yoko Shiho Gatame), North-south (Kami Shiho Gatame) +5Stephan Kesting · John Danaher · Marcelo Garcia · Jason Scully · Tom DeBlassKimura trap back takePass or back take · Back take · IntermediateFrom Closed guard, Half guard, Side control (bottom) → Back controlStephan Kesting
 Back take from the dogfightPass or back take · Back take · IntermediateFrom Dogfight, Half guard, Half butterfly guard → Back controlStephan KestingMir lockSubmission · Shoulder lock · IntermediateFrom Closed guard, Side control (Yoko Shiho Gatame), Half guard
 Dogfight sweepSweep · Half guard · IntermediateFrom Dogfight, Half guard, Half butterfly guard → Side control (Yoko Shiho Gatame)
Knee shield / Z-guard
Half guard with your top shin across their torso, knee high toward their shoulder. The frame keeps their weight off you and sets up sweeps.7 moves · 7 techniquesOpen lessonQuick guide for Knee shield / Z-guard
Half guard with your top shin across their torso, knee high toward their shoulder. The frame keeps their weight off you and sets up sweeps.
- Keep the shin across their body as a frame
- Control their far arm or collar
- Off-balance them toward the shield
- The shield is a frame, not a wall: keep moving
- Pair it with an arm grip
If they lean their weight onto your shield → Kick it out to off-balance them and come up on a single leg
 Knee shield sweepSweep · Half guard · IntermediateFrom Knee shield / Z-guard → Half guard (top)Lachlan Giles · Bernardo FariaTriangle (Sankaku Jime)Submission · Choke · FundamentalFrom Closed guard, Knee shield / Z-guard, Spider guard +5Stephan Kesting · Lachlan Giles · John Danaher · Ryan HallGuillotineSubmission · Choke · FundamentalFrom Closed guard, Butterfly guard, Half guard +4Marcelo Garcia · John Danaher · Chewjitsu · André GalvãoKimura (Gyaku Ude Garami)Submission · Shoulder lock · FundamentalFrom Closed guard, Side control (Yoko Shiho Gatame), North-south (Kami Shiho Gatame) +5Stephan Kesting · John Danaher · Marcelo Garcia · Jason Scully · Tom DeBlassJohn Wayne sweep (knee lever)Sweep · Half guard · FundamentalFrom Half guard, Knee shield / Z-guard → Side control (Yoko Shiho Gatame)Lachlan GilesChoi barSubmission · Armlock · AdvancedFrom Half guard, Knee shield / Z-guard, Closed guardTornado sweepSweep · Half guard · AdvancedFrom Half guard, Knee shield / Z-guard, Inverted guard → Side control (Yoko Shiho Gatame)
Deep half guard
You dive under their hips and hug one leg, with their weight on top of you. Hard to pass and full of sweeps.4 moves · 5 techniquesOpen lessonQuick guide for Deep half guard
You dive under their hips and hug one leg, with their weight on top of you. Hard to pass and full of sweeps.
- Get all the way under with their leg hugged to your chest
- Keep your head on the inside
- Off-balance them forward or backward to sweep
- Deep means deep: your shoulders under their hips
- Sweep their base, not their upper body
If they stand tall over you → Use the waiter sweep: lift their far leg from underneath
 Waiter sweepSweep · Deep half guard · IntermediateFrom Deep half guard → Half guard (top)Jeff Glover · Bernardo Faria · Lachlan Giles
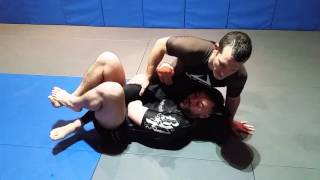 Homer Simpson sweepSweep · Deep half guard · IntermediateFrom Deep half guard → Half guard (top)Jeff Glover · Lachlan Giles
 Toe holdSubmission · Leg lock · IntermediateFrom Saddle (Inside Sankaku), 50/50, Deep half guardJohn Danaher · Craig JonesKneebar (Hiza Juji Gatame)Submission · Leg lock · IntermediateFrom Leg entanglement (Ashi Garami), Saddle (Inside Sankaku), Deep half guard +1John Danaher · Lachlan Giles
 Single legTakedown · Wrestling · FundamentalFrom Standing, Dogfight, Deep half guard → Side control (Yoko Shiho Gatame)Stephan Kesting · Chewjitsu · John Danaher · Jason Scully
Rubber guard
From closed guard, one leg climbs high over their shoulder and you lock it with your arm. Breaks posture hard. Needs flexible hips.3 moves · 4 techniquesOpen lessonQuick guide for Rubber guard
From closed guard, one leg climbs high over their shoulder and you lock it with your arm. Breaks posture hard. Needs flexible hips.
- Break their posture first
- Climb your leg high across their shoulders and clamp it
- Chain the omoplata, triangle and gogoplata
- Flexibility helps, but control their head first
- Use it in short bursts
If you clamp mission control → Walk your foot toward their head to set the omoplata
 GogoplataSubmission · Choke · AdvancedFrom Rubber guardEddie Bravo · Stephan KestingOmoplata sweepSweep · Closed guard · IntermediateFrom Closed guard, Rubber guard, Spider guard +1 → Side control (Yoko Shiho Gatame)Stephan Kesting · Lachlan GilesTriangle (Sankaku Jime)Submission · Choke · FundamentalFrom Closed guard, Knee shield / Z-guard, Spider guard +5Stephan Kesting · Lachlan Giles · John Danaher · Ryan HallOmoplataSubmission · Shoulder lock · IntermediateFrom Closed guard, Rubber guard, Spider guard +4Stephan Kesting · Lachlan Giles
Half butterfly guard
Half guard where your free leg is inserted as a butterfly hook under their thigh instead of lying flat. The hook lets you lift their weight and sweep, and it keeps pressure passers from settling on you.6 moves · 3 techniquesOpen lessonQuick guide for Half butterfly guard
Half guard where your free leg is inserted as a butterfly hook under their thigh instead of lying flat. The hook lets you lift their weight and sweep, and it keeps pressure passers from settling on you.
- Get on your side with an underhook or frame
- Keep the butterfly hook active under their thigh
- Lift them and sweep, or come up to the dogfight
- Upper body connection before you lift
- The hook is a lever: use it while their weight is on it
If they lean their weight onto you → Elevate with the hook as you fall to your underhook side for the sweep
 Butterfly hook sweepSweep · Butterfly guard · FundamentalFrom Butterfly guard, Half butterfly guard → Side control (Yoko Shiho Gatame)Marcelo Garcia · Stephan Kesting · ChewjitsuBack take from the dogfightPass or back take · Back take · IntermediateFrom Dogfight, Half guard, Half butterfly guard → Back controlStephan KestingDogfight sweepSweep · Half guard · IntermediateFrom Dogfight, Half guard, Half butterfly guard → Side control (Yoko Shiho Gatame)
Lockdown
A half guard where you triple-wrap their trapped leg with both of yours and stretch it out. Eddie Bravo’s 10th Planet staple: it kills their base and sets up the old school sweep, the electric chair and back takes.4 moves · 2 techniquesOpen lessonQuick guide for Lockdown
A half guard where you triple-wrap their trapped leg with both of yours and stretch it out. Eddie Bravo’s 10th Planet staple: it kills their base and sets up the old school sweep, the electric chair and back takes.
- Lock both legs around their leg, feet hooked
- Stretch their leg with the whip-up
- Win the underhook and get your head tight to them
- Lockdown first, then the underhook
- A stretched leg means no base for them
If they try to pull their leg out → Whip-up: extend your legs to stretch them and kill their base
Open guard 12
Seated open guard
Feet and hands on their hips, biceps or sleeves keep them at a distance. The hub for every open guard.12 moves · 8 techniquesOpen lessonQuick guide for Seated open guard
Feet and hands on their hips, biceps or sleeves keep them at a distance. The hub for every open guard.
- Keep at least two points of contact: feet, shins or grips
- Keep your knees between you and them
- Move into a sweep, a guard, or wrestle up
- Distance management: too far you can’t attack, too close you get smashed
- Hands and feet work together
If they stand and reach for your feet → Grip a sleeve or ankle and put a foot on their hip or bicep
 Tripod sweepSweep · Open guard · FundamentalFrom Seated open guard, Collar sleeve guard → Passing open guardStephan Kesting · Chewjitsu · Bernardo Faria
 Sickle sweepSweep · Open guard · FundamentalFrom Seated open guard, Collar sleeve guard → Passing open guardStephan Kesting · Chewjitsu · Bernardo Faria
 Loop chokeSubmission · Choke · Intermediate · GiFrom Seated open guard, Front headlock, Turtle (top)Bernardo Faria · Stephan KestingTriangle (Sankaku Jime)Submission · Choke · FundamentalFrom Closed guard, Knee shield / Z-guard, Spider guard +5Stephan Kesting · Lachlan Giles · John Danaher · Ryan HallArmbar (Juji Gatame)Submission · Armlock · FundamentalFrom Closed guard, Mount (Tate Shiho Gatame), Knee on belly +4Stephan Kesting · Chewjitsu · Roger Gracie · Rener GracieOmoplataSubmission · Shoulder lock · IntermediateFrom Closed guard, Rubber guard, Spider guard +4Stephan Kesting · Lachlan Giles
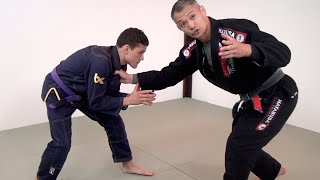 Collar dragTakedown · Wrestling · IntermediateFrom Standing, Seated open guard → Back controlStephan Kesting · John DanaherArm drag to the back (guard)Pass or back take · Back take · FundamentalFrom Closed guard, Seated open guard, Butterfly guard → Back controlAndré Galvão · Stephan Kesting
Butterfly guard
Seated with hooks inside both thighs. Underhooks and elevation take away their balance.7 moves · 6 techniquesOpen lessonQuick guide for Butterfly guard
Seated with hooks inside both thighs. Underhooks and elevation take away their balance.
- Get an underhook or a two-on-one grip
- Stay sitting up with your head level with theirs
- Elevate with a hook as they lean
- Upper body control before the sweep
- Your chest stays close to theirs
If they lean their weight forward onto you → Fall to the side of your underhook and lift with the hook for the sweep
Butterfly hook sweepSweep · Butterfly guard · FundamentalFrom Butterfly guard, Half butterfly guard → Side control (Yoko Shiho Gatame)Marcelo Garcia · Stephan Kesting · ChewjitsuGuillotineSubmission · Choke · FundamentalFrom Closed guard, Butterfly guard, Half guard +4Marcelo Garcia · John Danaher · Chewjitsu · André GalvãoKimura (Gyaku Ude Garami)Submission · Shoulder lock · FundamentalFrom Closed guard, Side control (Yoko Shiho Gatame), North-south (Kami Shiho Gatame) +5Stephan Kesting · John Danaher · Marcelo Garcia · Jason Scully · Tom DeBlass Float passPass or back take · Pressure pass · IntermediateFrom Passing butterfly guard, Butterfly guard → Side control (Yoko Shiho Gatame)Stephan KestingArm drag to the back (guard)Pass or back take · Back take · FundamentalFrom Closed guard, Seated open guard, Butterfly guard → Back controlAndré Galvão · Stephan Kesting
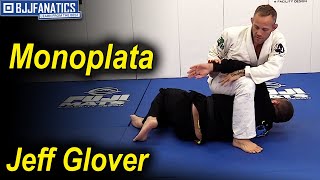 MonoplataSubmission · Shoulder lock · IntermediateFrom Side control (Yoko Shiho Gatame), Mount (Tate Shiho Gatame), Butterfly guard
De La Riva guard
Your outside leg hooks around their lead leg from the outside, with a grip on their ankle and their sleeve or collar.9 moves · 3 techniquesOpen lessonQuick guide for De La Riva guard
Your outside leg hooks around their lead leg from the outside, with a grip on their ankle and their sleeve or collar.
- Hook deep behind their knee from the outside
- Grip their ankle and a sleeve or collar
- Off-balance them backward or sideways
- Hook and ankle grip work together
- Keep your hips moving under them
If they put weight on the hooked leg → Pull the ankle and sweep backward
 De La Riva sweepSweep · De La Riva · IntermediateFrom De La Riva guard → Passing open guardBernardo Faria · Lachlan Giles
 BerimboloSweep · De La Riva · AdvancedFrom De La Riva guard, Inverted guard → Back controlMikey Musumeci · Lachlan Giles · André GalvãoOmoplataSubmission · Shoulder lock · IntermediateFrom Closed guard, Rubber guard, Spider guard +4Stephan Kesting · Lachlan Giles
Reverse De La Riva
Your leg hooks inside their lead leg, often after they start a knee cut. A key guard for stopping knee-slice passes.6 moves · 2 techniquesOpen lessonQuick guide for Reverse De La Riva
Your leg hooks inside their lead leg, often after they start a knee cut. A key guard for stopping knee-slice passes.
- Hook from the inside, knee in front of their knee
- Grip their far sleeve or collar
- Turn under to sweep or invert to the back
- Block the knee line
- Turning under is the main attack
If they try to knee cut → The reverse hook blocks the knee: off-balance and sweep

X-guard
You are under them, one leg hooked behind their knee and the other foot on their far hip, hugging their leg.4 moves · 4 techniquesOpen lessonQuick guide for X-guard
You are under them, one leg hooked behind their knee and the other foot on their far hip, hugging their leg.
- Both hooks under their leg, crossed
- Hug their other leg or grip the ankle
- Extend your legs to off-balance them
- Under their center of gravity
- Stand up into the sweep, don’t just roll them
If they lean forward over you → Extend and pull to sweep them backward
 X-guard technical stand-up sweepSweep · X-guard · IntermediateFrom X-guard, Single leg X → Passing open guardMarcelo Garcia · John Danaher · Lachlan Giles
 X-guard back sweepSweep · X-guard · IntermediateFrom X-guard → Side control (Yoko Shiho Gatame)
 X-guard overhead sweepSweep · X-guard · IntermediateFrom X-guard, Single leg X → Mount (Tate Shiho Gatame)
 Straight ankle lockSubmission · Leg lock · IntermediateFrom Single leg X, Leg entanglement (Ashi Garami), X-guardJohn Danaher · Craig Jones · Lachlan Giles · Nicky Ryan
Spider guard
Sleeve grips with your feet on their biceps. The long levers keep them far away and set up sweeps and triangles.5 moves · 6 techniquesOpen lessonQuick guide for Spider guard
Sleeve grips with your feet on their biceps. The long levers keep them far away and set up sweeps and triangles.
- Grip both sleeves tight
- Feet on the biceps, legs extended to create tension
- Off-balance them to sweep or triangle
- Tension: push with your feet, pull with your hands
- Switch guards before you lose grips
If they pull their arm back to strip a grip → Use the tension to sweep or bring your foot in for a lasso
 Balloon sweepSweep · Spider guard · Intermediate · GiFrom Spider guard → Mount (Tate Shiho Gatame)Bernardo Faria · Chewjitsu
 Spider guard sweepSweep · Spider guard · Intermediate · GiFrom Spider guard → Side control (Yoko Shiho Gatame)Stephan KestingOmoplata sweepSweep · Closed guard · IntermediateFrom Closed guard, Rubber guard, Spider guard +1 → Side control (Yoko Shiho Gatame)Stephan Kesting · Lachlan GilesTriangle (Sankaku Jime)Submission · Choke · FundamentalFrom Closed guard, Knee shield / Z-guard, Spider guard +5Stephan Kesting · Lachlan Giles · John Danaher · Ryan HallOmoplataSubmission · Shoulder lock · IntermediateFrom Closed guard, Rubber guard, Spider guard +4Stephan Kesting · Lachlan GilesBaratoplataSubmission · Shoulder lock · AdvancedFrom Closed guard, Spider guard
Lasso guard
One leg wraps around their arm, foot on their back or hip. Very hard to pass and great for slowing a pressure passer.4 moves · 4 techniquesOpen lessonQuick guide for Lasso guard
One leg wraps around their arm, foot on their back or hip. Very hard to pass and great for slowing a pressure passer.
- Deep lasso with your foot behind their shoulder
- Hold the same sleeve tight
- Pair it with spider, De La Riva or a collar grip
- Lasso controls posture and the arm at once
- Use the second foot actively
If they try to circle to the lasso side → Use your other foot on their hip and swing under for the sweep
 Lasso sweepSweep · Spider guard · Intermediate · GiFrom Lasso guard → Passing open guardBernardo Faria · Keenan Cornelius · Stephan KestingOmoplata sweepSweep · Closed guard · IntermediateFrom Closed guard, Rubber guard, Spider guard +1 → Side control (Yoko Shiho Gatame)Stephan Kesting · Lachlan GilesTriangle (Sankaku Jime)Submission · Choke · FundamentalFrom Closed guard, Knee shield / Z-guard, Spider guard +5Stephan Kesting · Lachlan Giles · John Danaher · Ryan HallOmoplataSubmission · Shoulder lock · IntermediateFrom Closed guard, Rubber guard, Spider guard +4Stephan Kesting · Lachlan Giles
Collar sleeve guard
One hand on the collar, one on the sleeve, a foot on their bicep and the other on their hip or hooking a leg.5 moves · 4 techniquesOpen lessonQuick guide for Collar sleeve guard
One hand on the collar, one on the sleeve, a foot on their bicep and the other on their hip or hooking a leg.
- Collar and opposite sleeve grips
- Foot on the bicep of the sleeve arm
- Pull them forward to sweep or triangle
- Grips decide everything
- Use the push-pull with feet and hands
If they lean back to break your grips → Follow with a sweep or switch to De La Riva
Tripod sweepSweep · Open guard · FundamentalFrom Seated open guard, Collar sleeve guard → Passing open guardStephan Kesting · Chewjitsu · Bernardo FariaSickle sweepSweep · Open guard · FundamentalFrom Seated open guard, Collar sleeve guard → Passing open guardStephan Kesting · Chewjitsu · Bernardo FariaTriangle (Sankaku Jime)Submission · Choke · FundamentalFrom Closed guard, Knee shield / Z-guard, Spider guard +5Stephan Kesting · Lachlan Giles · John Danaher · Ryan HallOmoplataSubmission · Shoulder lock · IntermediateFrom Closed guard, Rubber guard, Spider guard +4Stephan Kesting · Lachlan GilesInverted guard
You roll onto your shoulders so your legs face them. Used to recover guard and to enter berimbolos and triangles.3 moves · 3 techniquesOpen lessonQuick guide for Inverted guard
You roll onto your shoulders so your legs face them. Used to recover guard and to enter berimbolos and triangles.
- Turn onto your shoulders, never your neck
- Keep your legs between you and them
- Return to guard or attack the back or legs
- Safety first: roll on the shoulders
- Inversion is a short transition, not a place to stay
If they walk around your legs → Invert and swing your legs back in front of them
BerimboloSweep · De La Riva · AdvancedFrom De La Riva guard, Inverted guard → Back controlMikey Musumeci · Lachlan Giles · André GalvãoTriangle (Sankaku Jime)Submission · Choke · FundamentalFrom Closed guard, Knee shield / Z-guard, Spider guard +5Stephan Kesting · Lachlan Giles · John Danaher · Ryan HallTornado sweepSweep · Half guard · AdvancedFrom Half guard, Knee shield / Z-guard, Inverted guard → Side control (Yoko Shiho Gatame)Shin-to-shin
Seated in front of a standing opponent with your shin against their lead shin and a grip on that leg. A modern hub for leg entanglements, sweeps and wrestle-ups.4 moves · 1 techniquesOpen lessonQuick guide for Shin-to-shin
Seated in front of a standing opponent with your shin against their lead shin and a grip on that leg. A modern hub for leg entanglements, sweeps and wrestle-ups.
- Shin pressed across their lead shin
- Grip their ankle or knee
- Enter single leg X or wrestle up
- Stay connected to the leg
- Elevate before you attack
If they step back → Follow with the grip or wrestle up on the leg

Worm guard
You feed their own lapel around their lead leg and grip it, building a hook that is very hard to remove. A Keenan Cornelius invention.3 moves · 1 techniquesOpen lessonQuick guide for Worm guard
You feed their own lapel around their lead leg and grip it, building a hook that is very hard to remove. A Keenan Cornelius invention.
- Lapel fed deep behind their knee
- Grip the lapel with your same-side hand
- Sweep or take the back
- Deep lapel behind the knee
- Pull the lapel and push the hip together
If they strip the lapel → Re-feed it as they reach

R-guard
An open guard against a standing opponent, a hybrid of De La Riva and reverse De La Riva: you lie on your outside hip with a low grip on their ankle and your legs locked deep around their leg. Your shin pushes their knee out until they post, then you sweep, wrestle up or pummel into the leg entanglements.6 moves · 0 techniquesOpen lessonQuick guide for R-guard
An open guard against a standing opponent, a hybrid of De La Riva and reverse De La Riva: you lie on your outside hip with a low grip on their ankle and your legs locked deep around their leg. Your shin pushes their knee out until they post, then you sweep, wrestle up or pummel into the leg entanglements.
- Low grip on their ankle and keep pulling it to you
- Legs locked deep, below their shin
- Off-balance them until they post, then pummel inside
- Outside hip, not flat
- Their balance first, then the legs
If they post a hand on the mat to stay up → Pummel both feet inside and enter single leg X or ashi garami
No standalone techniques yet: follow the moves above or open the position lesson.
Leg entanglements 5
Single leg X
One leg between theirs, your outside foot on their hip, and one of their legs trapped across your body. Also called X-ashi or cross ashi garami.6 moves · 6 techniquesOpen lessonQuick guide for Single leg X
One leg between theirs, your outside foot on their hip, and one of their legs trapped across your body. Also called X-ashi or cross ashi garami.
- Hug their leg to your chest
- Foot in their hip, other leg behind their knee
- Sweep them backward or attack the foot
- Their leg tight to your chest
- Off-balance first, then attack
If they lean forward to stop the sweep → Switch to X-guard or the ankle lock
 Single leg X sweepSweep · Leg entanglements · IntermediateFrom Single leg X → Passing open guardJohn Danaher · Lachlan GilesStraight ankle lockSubmission · Leg lock · IntermediateFrom Single leg X, Leg entanglement (Ashi Garami), X-guardJohn Danaher · Craig Jones · Lachlan Giles · Nicky RyanX-guard technical stand-up sweepSweep · X-guard · IntermediateFrom X-guard, Single leg X → Passing open guardMarcelo Garcia · John Danaher · Lachlan Giles
 Outside heel hookSubmission · Leg lock · AdvancedFrom Leg entanglement (Ashi Garami), Single leg XJohn Danaher · Craig Jones · Nicky Ryan
 Estima lockSubmission · Leg lock · AdvancedFrom 50/50, Single leg X, Leg dragLachlan GilesX-guard overhead sweepSweep · X-guard · IntermediateFrom X-guard, Single leg X → Mount (Tate Shiho Gatame)
Leg entanglement (Ashi Garami)
Your legs control one of theirs, foot on their hip and knee pinned. The base for the straight foot lock.4 moves · 4 techniquesOpen lessonQuick guide for Leg entanglement (Ashi Garami)
Your legs control one of theirs, foot on their hip and knee pinned. The base for the straight foot lock.
- Control their knee line with your legs
- Your foot in their hip
- Grip their foot and keep it close
- Control the knee before attacking the foot
- Stay tight: space is their escape
If they sit up toward you → Control their far knee and finish the ankle lock
Outside heel hookSubmission · Leg lock · AdvancedFrom Leg entanglement (Ashi Garami), Single leg XJohn Danaher · Craig Jones · Nicky RyanKneebar (Hiza Juji Gatame)Submission · Leg lock · IntermediateFrom Leg entanglement (Ashi Garami), Saddle (Inside Sankaku), Deep half guard +1John Danaher · Lachlan GilesStraight ankle lockSubmission · Leg lock · IntermediateFrom Single leg X, Leg entanglement (Ashi Garami), X-guardJohn Danaher · Craig Jones · Lachlan Giles · Nicky Ryan Ashi garami escapeEscape · Leg lock escape · IntermediateFrom Leg lock defense, Leg entanglement (Ashi Garami) → Passing open guard
50/50
Both players have mirrored legs entangled. An even position: the first to break the other’s mechanics wins.4 moves · 4 techniquesOpen lessonQuick guide for 50/50
Both players have mirrored legs entangled. An even position: the first to break the other’s mechanics wins.
- Lock your legs tight around their leg
- Control their foot and keep your own foot hidden
- Off-balance to sweep or attack the heel
- Defend your own foot first
- Head and hips toward their knee
If you both reach for the foot → Hide your heel first, then attack
Estima lockSubmission · Leg lock · AdvancedFrom 50/50, Single leg X, Leg dragLachlan Giles Inside heel hookSubmission · Leg lock · AdvancedFrom Saddle (Inside Sankaku), 50/50John Danaher · Craig Jones · Nicky RyanToe holdSubmission · Leg lock · IntermediateFrom Saddle (Inside Sankaku), 50/50, Deep half guardJohn Danaher · Craig Jones
 50/50 escapeEscape · Leg lock escape · AdvancedFrom Leg lock defense, 50/50 → Passing open guard
Saddle (Inside Sankaku)
Your legs triangle around one of their legs with your foot across their hip. The strongest leg lock position.2 moves · 4 techniquesOpen lessonQuick guide for Saddle (Inside Sankaku)
Your legs triangle around one of their legs with your foot across their hip. The strongest leg lock position.
- Triangle your legs around their leg, knee pinned
- Hide your own feet
- Control their foot and heel
- Heel hooks give little warning: apply slowly
- Control the knee line before the heel
If they try to roll out → Follow the rotation and keep your triangle tight
Inside heel hookSubmission · Leg lock · AdvancedFrom Saddle (Inside Sankaku), 50/50John Danaher · Craig Jones · Nicky RyanToe holdSubmission · Leg lock · IntermediateFrom Saddle (Inside Sankaku), 50/50, Deep half guardJohn Danaher · Craig JonesKneebar (Hiza Juji Gatame)Submission · Leg lock · IntermediateFrom Leg entanglement (Ashi Garami), Saddle (Inside Sankaku), Deep half guard +1John Danaher · Lachlan Giles Saddle escapeEscape · Leg lock escape · AdvancedFrom Leg lock defense, Saddle (Inside Sankaku) → Passing open guard
K-guard
An open guard where your inside leg wraps their near thigh from the inside, like reverse De La Riva but with your knee kept inside theirs, while you hug that leg. It sets up 50/50, the saddle and back takes. Popularised by Lachlan Giles.4 moves · 0 techniquesOpen lessonQuick guide for K-guard
An open guard where your inside leg wraps their near thigh from the inside, like reverse De La Riva but with your knee kept inside theirs, while you hug that leg. It sets up 50/50, the saddle and back takes. Popularised by Lachlan Giles.
- Wrap their thigh with your inside leg, knee inside their knee
- Hug their near leg
- Turn under their hips
- Get your hips under theirs
- Hug the leg tight
If they turn away → Take the back
No standalone techniques yet: follow the moves above or open the position lesson.
Passing 6
Closed guard (top)
You are inside their closed guard. Stay safe, posture up and open the legs.5 moves · 6 techniquesOpen lessonQuick guide for Closed guard (top)
You are inside their closed guard. Stay safe, posture up and open the legs.
- Posture up: head up, back straight
- Control their hips or biceps
- Open their legs, then pass
- Posture before everything
- Elbows in, hands on their hips
If they pull your head down → Bring your hands back to their hips and re-posture
 Over-under passPass or back take · Pressure pass · FundamentalFrom Closed guard (top), Passing open guard → Side control (Yoko Shiho Gatame)Bernardo Faria · Lachlan Giles
 Stack passPass or back take · Pressure pass · FundamentalFrom Closed guard (top) → Side control (Yoko Shiho Gatame)Bernardo Faria · Stephan Kesting
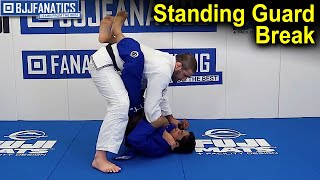 Standing guard breakPass or back take · Standing pass · FundamentalFrom Closed guard (top) → Passing open guardBernardo Faria · Chewjitsu · Stephan Kesting
 Armbar escape (hitchhiker)Escape · Submission escape · FundamentalFrom Closed guard (top), Mount (bottom) → Closed guard (top)Stephan Kesting · Rener Gracie · Chewjitsu
 Triangle escapeEscape · Submission escape · FundamentalFrom Closed guard (top) → Passing open guardRyan Hall · Stephan Kesting · Rener Gracie
 Guillotine escapeEscape · Submission escape · FundamentalFrom Standing, Closed guard (top), Dogfight → Side control (Yoko Shiho Gatame)John Danaher · Stephan Kesting · André Galvão
Passing open guard
You are standing or kneeling against their open guard. Break grips, control the legs and get to the side.6 moves · 10 techniquesOpen lessonQuick guide for Passing open guard
You are standing or kneeling against their open guard. Break grips, control the legs and get to the side.
- Break their grips first
- Control their knees or ankles
- Pass to the side and pin
- Pass the legs, then the hips
- Pressure and movement together
If they grab your sleeve and put a foot on your hip → Break the grip and push the foot down
 Toreando passPass or back take · Standing pass · FundamentalFrom Passing open guard → Side control (Yoko Shiho Gatame)Bernardo Faria · Gordon Ryan · Jason Scully
 Knee slice passPass or back take · Pressure pass · FundamentalFrom Passing open guard, Headquarters (HQ), Half guard (top) → Side control (Yoko Shiho Gatame)Bernardo Faria · Lachlan Giles · Gordon Ryan · André Galvão
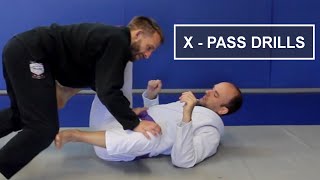 X-passPass or back take · Standing pass · IntermediateFrom Passing open guard → Side control (Yoko Shiho Gatame)Bernardo Faria · Chewjitsu
 Leg drag passPass or back take · Leg drag · IntermediateFrom Passing open guard, Headquarters (HQ) → Leg dragGordon Ryan · Bernardo Faria
 Cartwheel passPass or back take · Standing pass · AdvancedFrom Passing open guard, Passing butterfly guard → Side control (Yoko Shiho Gatame)Over-under passPass or back take · Pressure pass · FundamentalFrom Closed guard (top), Passing open guard → Side control (Yoko Shiho Gatame)Bernardo Faria · Lachlan Giles
 Body lock passPass or back take · Pressure pass · IntermediateFrom Half guard (top), Passing open guard, Passing butterfly guard → Side control (Yoko Shiho Gatame)Gordon Ryan · Lachlan Giles · John Danaher · Tom DeBlass
 Backstep passPass or back take · Pressure pass · IntermediateFrom Half guard (top), Passing open guard → Side control (Yoko Shiho Gatame)Gordon Ryan · Bernardo Faria
 Leg weave passPass or back take · Pressure pass · IntermediateFrom Half guard (top), Passing open guard → Side control (Yoko Shiho Gatame)Craig Jones
 Folding passPass or back take · Pressure pass · IntermediateFrom Half guard (top), Passing open guard → Side control (Yoko Shiho Gatame)
Half guard (top)
They have trapped your leg. Flatten them, kill the underhook, then free your leg.5 moves · 10 techniquesOpen lessonQuick guide for Half guard (top)
They have trapped your leg. Flatten them, kill the underhook, then free your leg.
- Crossface and win the underhook
- Flatten them on their back
- Free your leg and pass
- Head position wins
- Heavy shoulder on their face
If they start to get the underhook → Whizzer or crossface and flatten them again
Body lock passPass or back take · Pressure pass · IntermediateFrom Half guard (top), Passing open guard, Passing butterfly guard → Side control (Yoko Shiho Gatame)Gordon Ryan · Lachlan Giles · John Danaher · Tom DeBlass Smash passPass or back take · Pressure pass · FundamentalFrom Half guard (top) → Side control (Yoko Shiho Gatame)Bernardo Faria · Chewjitsu
 Long step passPass or back take · Pressure pass · IntermediateFrom Half guard (top) → Side control (Yoko Shiho Gatame)Gordon Ryan · Lachlan GilesBackstep passPass or back take · Pressure pass · IntermediateFrom Half guard (top), Passing open guard → Side control (Yoko Shiho Gatame)Gordon Ryan · Bernardo FariaLeg weave passPass or back take · Pressure pass · IntermediateFrom Half guard (top), Passing open guard → Side control (Yoko Shiho Gatame)Craig JonesFolding passPass or back take · Pressure pass · IntermediateFrom Half guard (top), Passing open guard → Side control (Yoko Shiho Gatame)
 Arm triangle (Kata Gatame)Submission · Choke · IntermediateFrom Side control (Yoko Shiho Gatame), Mount (Tate Shiho Gatame), Half guard (top) +1Stephan Kesting · Lachlan Giles · John Danaher · Ryan Hall
 D'Arce chokeSubmission · Choke · IntermediateFrom Front headlock, Turtle (top), Half guard (top)John Danaher · Stephan KestingKimura (Gyaku Ude Garami)Submission · Shoulder lock · FundamentalFrom Closed guard, Side control (Yoko Shiho Gatame), North-south (Kami Shiho Gatame) +5Stephan Kesting · John Danaher · Marcelo Garcia · Jason Scully · Tom DeBlassKnee slice passPass or back take · Pressure pass · FundamentalFrom Passing open guard, Headquarters (HQ), Half guard (top) → Side control (Yoko Shiho Gatame)Bernardo Faria · Lachlan Giles · Gordon Ryan · André Galvão
Headquarters (HQ)
Kneeling on their inside leg between their legs, other foot posted outside. A hub for many passes.4 moves · 2 techniquesOpen lessonQuick guide for Headquarters (HQ)
Kneeling on their inside leg between their legs, other foot posted outside. A hub for many passes.
- Knee pinned in their thigh
- Control their knee and ankle
- Choose the pass based on their defense
- Low base, heavy knee
- Pass in the direction they leave open
If they frame on your knee → Switch to the other side or the leg drag
Knee slice passPass or back take · Pressure pass · FundamentalFrom Passing open guard, Headquarters (HQ), Half guard (top) → Side control (Yoko Shiho Gatame)Bernardo Faria · Lachlan Giles · Gordon Ryan · André GalvãoLeg drag passPass or back take · Leg drag · IntermediateFrom Passing open guard, Headquarters (HQ) → Leg dragGordon Ryan · Bernardo FariaLeg drag
You throw their legs to one side and pin the hips. Their back is turned away and the pass is close.4 moves · 1 techniquesOpen lessonQuick guide for Leg drag
You throw their legs to one side and pin the hips. Their back is turned away and the pass is close.
- Pin their legs across your hip
- Control their far hip
- Walk around to side control or take the back
- Their hips face away, your hips stay close
- Pin before you pass
If they turn back to face you → Keep the hip pin and step around
Passing butterfly guard
On top of someone playing butterfly guard, their hooks under your thighs. You kill the hooks with low hips, heavy pressure and smart footwork before they can lift you.4 moves · 3 techniquesOpen lessonQuick guide for Passing butterfly guard
On top of someone playing butterfly guard, their hooks under your thighs. You kill the hooks with low hips, heavy pressure and smart footwork before they can lift you.
- Hips back and low so the hooks can’t lift you
- Head heavy on their chest or shoulder
- Pin a hook and pass to half guard top or side control
- Low hips beat hooks
- Win head position before you move
If they start to lift you with a hook → Sprawl your hips back and drop your weight
Float passPass or back take · Pressure pass · IntermediateFrom Passing butterfly guard, Butterfly guard → Side control (Yoko Shiho Gatame)Stephan KestingBody lock passPass or back take · Pressure pass · IntermediateFrom Half guard (top), Passing open guard, Passing butterfly guard → Side control (Yoko Shiho Gatame)Gordon Ryan · Lachlan Giles · John Danaher · Tom DeBlassCartwheel passPass or back take · Standing pass · AdvancedFrom Passing open guard, Passing butterfly guard → Side control (Yoko Shiho Gatame)Pins 7
Side control (Yoko Shiho Gatame)
Chest to chest, perpendicular to them. Pin the shoulders and hips, then attack or advance.6 moves · 11 techniquesOpen lessonQuick guide for Side control (Yoko Shiho Gatame)
Chest to chest, perpendicular to them. Pin the shoulders and hips, then attack or advance.
- Pin their shoulders and hips
- Crossface and control the far arm
- Attack or advance to mount
- Weight on their chest, not your knees
- Control the head and near hip
If they frame on your neck → Remove the frame and keep your weight on their chest
Arm triangle (Kata Gatame)Submission · Choke · IntermediateFrom Side control (Yoko Shiho Gatame), Mount (Tate Shiho Gatame), Half guard (top) +1Stephan Kesting · Lachlan Giles · John Danaher · Ryan Hall Baseball bat chokeSubmission · Choke · Intermediate · GiFrom Side control (Yoko Shiho Gatame), Knee on bellyStephan Kesting · Lachlan Giles
 Paper cutter chokeSubmission · Choke · Intermediate · GiFrom Side control (Yoko Shiho Gatame)Stephan Kesting · Roger Gracie
 Americana (Ude Garami)Submission · Shoulder lock · FundamentalFrom Side control (Yoko Shiho Gatame), Mount (Tate Shiho Gatame), Scarf hold (Kesa Gatame)Stephan Kesting · Chewjitsu · Jason ScullyWristlockSubmission · Wrist lock · IntermediateFrom Side control (Yoko Shiho Gatame), Mount (Tate Shiho Gatame), Closed guardStephan Kesting · Rener Gracie
 Von Flue chokeSubmission · Choke · FundamentalFrom Side control (Yoko Shiho Gatame)MonoplataSubmission · Shoulder lock · IntermediateFrom Side control (Yoko Shiho Gatame), Mount (Tate Shiho Gatame), Butterfly guardKimura (Gyaku Ude Garami)Submission · Shoulder lock · FundamentalFrom Closed guard, Side control (Yoko Shiho Gatame), North-south (Kami Shiho Gatame) +5Stephan Kesting · John Danaher · Marcelo Garcia · Jason Scully · Tom DeBlassTarikoplataSubmission · Shoulder lock · AdvancedFrom Closed guard, Side control (Yoko Shiho Gatame), Turtle (top)Lachlan Giles · Stephan KestingMir lockSubmission · Shoulder lock · IntermediateFrom Closed guard, Side control (Yoko Shiho Gatame), Half guardBicep slicerSubmission · Armlock · AdvancedFrom Closed guard, Mount (Tate Shiho Gatame), Side control (Yoko Shiho Gatame)
Knee on belly
One knee on their stomach, the other leg posted. A fast pressure position for transitions.3 moves · 3 techniquesOpen lessonQuick guide for Knee on belly
One knee on their stomach, the other leg posted. A fast pressure position for transitions.
- Knee on their belly, other leg posted
- Grip their collar or arm
- Attack the armbar or choke as they push
- Balance and mobility
- Pressure comes from your knee, not your hands
If they push your knee → The armbar or a choke opens up
Cross choke (Juji Jime)Submission · Choke · Fundamental · GiFrom Mount (Tate Shiho Gatame), Closed guard, Knee on belly +1Roger Gracie · Stephan KestingBaseball bat chokeSubmission · Choke · Intermediate · GiFrom Side control (Yoko Shiho Gatame), Knee on bellyStephan Kesting · Lachlan GilesArmbar (Juji Gatame)Submission · Armlock · FundamentalFrom Closed guard, Mount (Tate Shiho Gatame), Knee on belly +4Stephan Kesting · Chewjitsu · Roger Gracie · Rener GracieMount (Tate Shiho Gatame)
Seated on their torso, knees tight. Climb high, isolate an arm or control the head.5 moves · 11 techniquesOpen lessonQuick guide for Mount (Tate Shiho Gatame)
Seated on their torso, knees tight. Climb high, isolate an arm or control the head.
- Low, heavy mount with your knees tight
- Control their head and an arm
- Climb to high mount and attack
- Base before attacks
- Ride their movement
If they bridge → Post your hands or legs wide and keep your weight forward
Cross choke (Juji Jime)Submission · Choke · Fundamental · GiFrom Mount (Tate Shiho Gatame), Closed guard, Knee on belly +1Roger Gracie · Stephan Kesting Ezekiel choke (Sode Guruma Jime)Submission · Choke · IntermediateFrom Mount (Tate Shiho Gatame)Stephan Kesting · Chewjitsu
 Back take from mountPass or back take · Back take · FundamentalFrom Mount (Tate Shiho Gatame), Technical mount → Back controlStephan KestingArm triangle (Kata Gatame)Submission · Choke · IntermediateFrom Side control (Yoko Shiho Gatame), Mount (Tate Shiho Gatame), Half guard (top) +1Stephan Kesting · Lachlan Giles · John Danaher · Ryan Hall
 Mounted triangleSubmission · Choke · IntermediateFrom S-mount, Mount (Tate Shiho Gatame)Roger Gracie · John DanaherArmbar (Juji Gatame)Submission · Armlock · FundamentalFrom Closed guard, Mount (Tate Shiho Gatame), Knee on belly +4Stephan Kesting · Chewjitsu · Roger Gracie · Rener GracieAmericana (Ude Garami)Submission · Shoulder lock · FundamentalFrom Side control (Yoko Shiho Gatame), Mount (Tate Shiho Gatame), Scarf hold (Kesa Gatame)Stephan Kesting · Chewjitsu · Jason ScullyWristlockSubmission · Wrist lock · IntermediateFrom Side control (Yoko Shiho Gatame), Mount (Tate Shiho Gatame), Closed guardStephan Kesting · Rener Gracie
 S-mount armbarSubmission · Armlock · IntermediateFrom S-mount, Mount (Tate Shiho Gatame)Stephan KestingBicep slicerSubmission · Armlock · AdvancedFrom Closed guard, Mount (Tate Shiho Gatame), Side control (Yoko Shiho Gatame)MonoplataSubmission · Shoulder lock · IntermediateFrom Side control (Yoko Shiho Gatame), Mount (Tate Shiho Gatame), Butterfly guard
S-mount
From high mount, one knee slides up beside their head and your other leg folds with the foot near their hip, so your legs form an S around a trapped arm.2 moves · 4 techniquesOpen lessonQuick guide for S-mount
From high mount, one knee slides up beside their head and your other leg folds with the foot near their hip, so your legs form an S around a trapped arm.
- Isolate an arm
- High knee by their head
- Fall to the armbar or the triangle
- Isolate first, then climb
- Stay heavy
If they straighten the arm → Fall back to the armbar
Mounted triangleSubmission · Choke · IntermediateFrom S-mount, Mount (Tate Shiho Gatame)Roger Gracie · John DanaherS-mount armbarSubmission · Armlock · IntermediateFrom S-mount, Mount (Tate Shiho Gatame)Stephan KestingCross choke (Juji Jime)Submission · Choke · Fundamental · GiFrom Mount (Tate Shiho Gatame), Closed guard, Knee on belly +1Roger Gracie · Stephan KestingArmbar (Juji Gatame)Submission · Armlock · FundamentalFrom Closed guard, Mount (Tate Shiho Gatame), Knee on belly +4Stephan Kesting · Chewjitsu · Roger Gracie · Rener GracieTechnical mount
Half mount, half back: one knee posted, one leg tight across their back as they turn away.2 moves · 3 techniquesOpen lessonQuick guide for Technical mount
Half mount, half back: one knee posted, one leg tight across their back as they turn away.
- Knee up by their head, other knee against their back
- Control their top arm
- Move to the back or the armbar
- Follow their turns
- Stay tight to their body
If they turn away → Slide the bottom hook in for back control
Arm triangle (Kata Gatame)Submission · Choke · IntermediateFrom Side control (Yoko Shiho Gatame), Mount (Tate Shiho Gatame), Half guard (top) +1Stephan Kesting · Lachlan Giles · John Danaher · Ryan HallArmbar (Juji Gatame)Submission · Armlock · FundamentalFrom Closed guard, Mount (Tate Shiho Gatame), Knee on belly +4Stephan Kesting · Chewjitsu · Roger Gracie · Rener GracieBack take from mountPass or back take · Back take · FundamentalFrom Mount (Tate Shiho Gatame), Technical mount → Back controlStephan KestingNorth-south (Kami Shiho Gatame)
Chest over their head, hips toward their feet. Pin the shoulders and attack the neck or arm.3 moves · 2 techniquesOpen lessonQuick guide for North-south (Kami Shiho Gatame)
Chest over their head, hips toward their feet. Pin the shoulders and attack the neck or arm.
- Chest on their chest, hips low
- Control their arms
- Attack the north-south choke or kimura
- Weight through your chest
- Hips back, not up
If they push your hips away → Sprawl your hips back and down
 North-south chokeSubmission · Choke · IntermediateFrom North-south (Kami Shiho Gatame)Stephan Kesting · Lachlan Giles · Jason ScullyKimura (Gyaku Ude Garami)Submission · Shoulder lock · FundamentalFrom Closed guard, Side control (Yoko Shiho Gatame), North-south (Kami Shiho Gatame) +5Stephan Kesting · John Danaher · Marcelo Garcia · Jason Scully · Tom DeBlass
Scarf hold (Kesa Gatame)
You sit beside them, hip to hip, arm around their head and their arm trapped under yours. A judo pin.3 moves · 2 techniquesOpen lessonQuick guide for Scarf hold (Kesa Gatame)
You sit beside them, hip to hip, arm around their head and their arm trapped under yours. A judo pin.
- Arm under their head, near arm trapped
- Hips low, wide base
- Attack the trapped arm
- Keep the head control
- Low hips
If they bridge → Widen your base and drop your hips
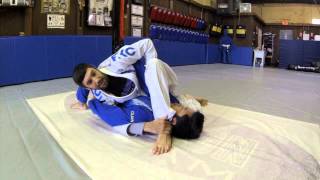 Kesa armlock (arm over the thigh)Submission · Armlock · IntermediateFrom Scarf hold (Kesa Gatame)Stephan KestingAmericana (Ude Garami)Submission · Shoulder lock · FundamentalFrom Side control (Yoko Shiho Gatame), Mount (Tate Shiho Gatame), Scarf hold (Kesa Gatame)Stephan Kesting · Chewjitsu · Jason Scully
Back & front 7
Back control
Behind them with a seatbelt grip and both hooks in. The most dominant position.5 moves · 4 techniquesOpen lessonQuick guide for Back control
Behind them with a seatbelt grip and both hooks in. The most dominant position.
- Seatbelt grip, chest tight to their back
- Hooks inside their thighs
- Fight their hands and finish the choke
- Control before the choke
- Win the hand fight
If they protect their neck with both hands → Attack the arm or switch to the bow and arrow
 Rear naked choke (Hadaka Jime)Submission · Choke · FundamentalFrom Back control, Turtle (top), Crucifix +2Stephan Kesting · Chewjitsu · John Danaher · Rener Gracie
 Bow and arrow chokeSubmission · Choke · Intermediate · GiFrom Back control, Turtle (top), Body triangle (back)Stephan Kesting · Lachlan Giles
 Sliding collar choke (Okuri Eri Jime)Submission · Choke · Fundamental · GiFrom Back control, Body triangle (back), Turtle (top)André Galvão · Stephan KestingArmbar (Juji Gatame)Submission · Armlock · FundamentalFrom Closed guard, Mount (Tate Shiho Gatame), Knee on belly +4Stephan Kesting · Chewjitsu · Roger Gracie · Rener Gracie
Crucifix
Their back is on you, one arm trapped by your legs and the other by your arms. Their neck is open.2 moves · 2 techniquesOpen lessonQuick guide for Crucifix
Their back is on you, one arm trapped by your legs and the other by your arms. Their neck is open.
- Trap one arm with your legs, the other with your arm
- Stay tight to their back
- Finish with a choke or armlock
- Two arms controlled, no defense
- Stay tight
If they try to roll → Follow and keep the arms trapped

Turtle (top)
They are on hands and knees. Chest on their back, hips heavy, and look for hooks or a crucifix.6 moves · 11 techniquesOpen lessonQuick guide for Turtle (top)
They are on hands and knees. Chest on their back, hips heavy, and look for hooks or a crucifix.
- Get chest-to-back connection
- Insert a hook or seatbelt
- Take the back or break them down
- Stay on their back, not their side
- Break them down before attacking
If they sit out → Follow and take the back
 Clock chokeSubmission · Choke · Intermediate · GiFrom Turtle (top)Stephan Kesting · Lachlan Giles
 Back take from turtlePass or back take · Back take · FundamentalFrom Turtle (top) → Back controlStephan KestingRear naked choke (Hadaka Jime)Submission · Choke · FundamentalFrom Back control, Turtle (top), Crucifix +2Stephan Kesting · Chewjitsu · John Danaher · Rener GracieD'Arce chokeSubmission · Choke · IntermediateFrom Front headlock, Turtle (top), Half guard (top)John Danaher · Stephan KestingAnaconda chokeSubmission · Choke · IntermediateFrom Front headlock, Turtle (top)Stephan Kesting · John DanaherBow and arrow chokeSubmission · Choke · Intermediate · GiFrom Back control, Turtle (top), Body triangle (back)Stephan Kesting · Lachlan Giles
 Peruvian necktieSubmission · Choke · AdvancedFrom Front headlock, Turtle (top)John Danaher · Stephan KestingTarikoplataSubmission · Shoulder lock · AdvancedFrom Closed guard, Side control (Yoko Shiho Gatame), Turtle (top)Lachlan Giles · Stephan KestingLoop chokeSubmission · Choke · Intermediate · GiFrom Seated open guard, Front headlock, Turtle (top)Bernardo Faria · Stephan KestingSliding collar choke (Okuri Eri Jime)Submission · Choke · Fundamental · GiFrom Back control, Body triangle (back), Turtle (top)André Galvão · Stephan Kesting
 Japanese necktieSubmission · Choke · IntermediateFrom Front headlock, Turtle (top)
Front headlock
You are on their head while they are on their knees or sprawled. Control the head and one arm.4 moves · 6 techniquesOpen lessonQuick guide for Front headlock
You are on their head while they are on their knees or sprawled. Control the head and one arm.
- Control their head and one arm
- Sprawl your hips back and heavy
- Snap down, go behind or choke
- Hips back, heavy on their head
- Control the arm and head together
If they lift their head → Re-snap them down
D'Arce chokeSubmission · Choke · IntermediateFrom Front headlock, Turtle (top), Half guard (top)John Danaher · Stephan KestingAnaconda chokeSubmission · Choke · IntermediateFrom Front headlock, Turtle (top)Stephan Kesting · John DanaherPeruvian necktieSubmission · Choke · AdvancedFrom Front headlock, Turtle (top)John Danaher · Stephan KestingJapanese necktieSubmission · Choke · IntermediateFrom Front headlock, Turtle (top)GuillotineSubmission · Choke · FundamentalFrom Closed guard, Butterfly guard, Half guard +4Marcelo Garcia · John Danaher · Chewjitsu · André GalvãoLoop chokeSubmission · Choke · Intermediate · GiFrom Seated open guard, Front headlock, Turtle (top)Bernardo Faria · Stephan KestingCrab ride
Behind them and slightly below as they sit or turtle, hooks inside their legs and chest on their back. A bridge between turtle, the berimbolo and back control.3 moves · 1 techniquesOpen lessonQuick guide for Crab ride
Behind them and slightly below as they sit or turtle, hooks inside their legs and chest on their back. A bridge between turtle, the berimbolo and back control.
- Hooks inside their thighs
- Chest glued to their back
- Get the seatbelt and second hook
- Chest connection
- Keep your hooks active
If they sit up tall → Seatbelt and second hook to back control

Truck
From turtle top or a rolling back take you trap one of their legs in a lockdown while sitting beside their hip. 10th Planet’s signature position.2 moves · 3 techniquesOpen lessonQuick guide for Truck
From turtle top or a rolling back take you trap one of their legs in a lockdown while sitting beside their hip. 10th Planet’s signature position.
- Lock their leg in your lockdown
- Sit beside their hip, not on top
- Control their far arm or head
- Keep the lockdown tight
- Stay beside their hip
If they turn toward you → Take the back


Body triangle (back)
Back control where your legs lock in a figure-four around their waist instead of using hooks. It’s harder to escape than hooks and frees your hands to fight for the choke.3 moves · 3 techniquesOpen lessonQuick guide for Body triangle (back)
Back control where your legs lock in a figure-four around their waist instead of using hooks. It’s harder to escape than hooks and frees your hands to fight for the choke.
- Lock the triangle tight around their waist
- Seatbelt and chest-to-back connection
- Hand-fight and finish the choke
- Lock high on the waist
- Keep your chest glued to their back
If they defend the choke with both hands → Trap an arm or switch chokes
Rear naked choke (Hadaka Jime)Submission · Choke · FundamentalFrom Back control, Turtle (top), Crucifix +2Stephan Kesting · Chewjitsu · John Danaher · Rener GracieBow and arrow chokeSubmission · Choke · Intermediate · GiFrom Back control, Turtle (top), Body triangle (back)Stephan Kesting · Lachlan GilesSliding collar choke (Okuri Eri Jime)Submission · Choke · Fundamental · GiFrom Back control, Body triangle (back), Turtle (top)André Galvão · Stephan KestingEscapes 8
Side control (bottom)
You are pinned. Frame, create space, then get your knee in or turn to your knees.4 moves · 5 techniquesOpen lessonQuick guide for Side control (bottom)
You are pinned. Frame, create space, then get your knee in or turn to your knees.
- Build frames: forearm on their neck, other hand on their hip
- Turn onto your side toward them
- Shrimp to make space and slide your knee in to recover guard
- Frames hold space, hip movement creates it
- Never push with straight arms: you’ll get armbarred
If they drive a crossface into your jaw → Turn your chin toward them, frame on their neck and shrimp your hips away
 Shrimp to guardEscape · Side control escape · FundamentalFrom Side control (bottom) → Half guardStephan Kesting · Chewjitsu · Priit Mihkelson · Rener Gracie
 Underhook escape to kneesEscape · Side control escape · FundamentalFrom Side control (bottom) → Turtle (bottom)Stephan Kesting · Lachlan Giles
 Buggy chokeSubmission · Choke · AdvancedFrom Side control (bottom)Stephan Kesting · Lachlan Giles
 Running escapeEscape · Side control escape · FundamentalFrom Side control (bottom) → Turtle (bottom)Kimura trap back takePass or back take · Back take · IntermediateFrom Closed guard, Half guard, Side control (bottom) → Back controlStephan Kesting
Mount (bottom)
They are sitting on you. Keep elbows tight, trap an arm and foot, then bridge or shrimp out.3 moves · 3 techniquesOpen lessonQuick guide for Mount (bottom)
They are sitting on you. Keep elbows tight, trap an arm and foot, then bridge or shrimp out.
- Elbows tight to your ribs, hands near your face
- Bridge to knock them forward when they post
- Elbow-knee escape back to half guard or full guard
- Survival first, escape second
- Bridge up and over your shoulder, not straight up
If they post a hand on the mat beside your head → Trap that arm and leg on the same side, then bridge and roll
 Upa (trap and roll)Escape · Mount escape · FundamentalFrom Mount (bottom) → Closed guard (top)Stephan Kesting · Chewjitsu · Priit Mihkelson · Rener Gracie
 Elbow-knee escapeEscape · Mount escape · FundamentalFrom Mount (bottom) → Half guardStephan Kesting · Chewjitsu · Priit Mihkelson · Rener GracieArmbar escape (hitchhiker)Escape · Submission escape · FundamentalFrom Closed guard (top), Mount (bottom) → Closed guard (top)Stephan Kesting · Rener Gracie · Chewjitsu
Back control (defend)
They are on your back. Protect the neck and fight the hooks before the choke.3 moves · 2 techniquesOpen lessonQuick guide for Back control (defend)
They are on your back. Protect the neck and fight the hooks before the choke.
- Chin tucked, two hands on their choking arm
- Slide your shoulders to the mat on their underhook side, away from the choking arm
- Clear the bottom hook and turn into them to recover guard
- Two hands on one arm
- Escape to the underhook side
If they slip an arm under your chin → Pull their wrist down with both hands and turn your chin into the elbow
 Back escape to guardEscape · Back escape · FundamentalFrom Back control (defend) → Half guardStephan Kesting · Chewjitsu · Priit Mihkelson · Ryan Hall
 Rear naked choke defenseEscape · Submission escape · FundamentalFrom Back control (defend) → Half guardRener Gracie · Stephan Kesting · Priit Mihkelson
Knee on belly (bottom)
Their knee is on your stomach. Push the knee, turn toward them and recover guard.3 moves · 2 techniquesOpen lessonQuick guide for Knee on belly (bottom)
Their knee is on your stomach. Push the knee, turn toward them and recover guard.
- Stiff-arm their knee or hip to take the weight off
- Shrimp away from the knee
- Recover guard or turn to your knees
- Push the knee, not the chest
- Move your hips away from the knee
If they drive their knee into your belly → Push their knee with both hands and shrimp your hips out


North-south (bottom)
They are over your head. Protect your neck, frame their hips and turn in.3 moves · 1 techniquesOpen lessonQuick guide for North-south (bottom)
They are over your head. Protect your neck, frame their hips and turn in.
- Frame on their hips to keep them from settling
- Turn onto your side
- Swing your legs back in to recover guard
- Turn to your side
- Frames on the hips, not the head
If they sprawl their hips low → Frame on the hips and walk your feet to turn

Scarf hold (bottom)
They sit beside you in a scarf hold. Free your arm and head, then bridge them over or turn away.3 moves · 1 techniquesOpen lessonQuick guide for Scarf hold (bottom)
They sit beside you in a scarf hold. Free your arm and head, then bridge them over or turn away.
- Free your trapped arm first
- Bridge into them and roll them over
- Or turn away and get to their back
- Free the arm, then escape
- Bridge toward their back
If they lean their weight onto you → Bridge into them and roll them over your body

Turtle (bottom)
On hands and knees. Defensive, but a common transition point in scrambles.5 moves · 6 techniquesOpen lessonQuick guide for Turtle (bottom)
On hands and knees. Defensive, but a common transition point in scrambles.
- Elbows to knees, hands fighting their grips
- Sit out to face them, or roll (Granby or Peterson)
- Recover guard or come up to standing
- Don’t stay in turtle
- Keep your elbows glued to your knees
If they slide a hook in → Hand fight and Granby roll to recover guard
 Granby rollEscape · Turtle escape · IntermediateFrom Turtle (bottom) → Closed guardLachlan Giles · Priit Mihkelson
 Peterson rollEscape · Turtle escape · IntermediateFrom Turtle (bottom) → Side control (Yoko Shiho Gatame)Stephan Kesting · Lachlan Giles
 Sit-outEscape · Turtle escape · FundamentalFrom Turtle (bottom) → StandingStephan Kesting · Chewjitsu
 Front headlock escapeEscape · Turtle escape · FundamentalFrom Turtle (bottom), Standing → StandingStephan Kesting · Chewjitsu
 Guard recovery from turtleEscape · Turtle escape · FundamentalFrom Turtle (bottom) → Closed guardRear naked choke (Hadaka Jime)Submission · Choke · FundamentalFrom Back control, Turtle (top), Crucifix +2Stephan Kesting · Chewjitsu · John Danaher · Rener Gracie
Leg lock defense
Your leg is trapped. Hide your heel, clear your knee past their hips and turn the fight to the top.3 moves · 4 techniquesOpen lessonQuick guide for Leg lock defense
Your leg is trapped. Hide your heel, clear your knee past their hips and turn the fight to the top.
- Hide your heel from their grip
- Clear your knee past their hip (the knee line)
- Escape the entanglement or counter-attack
- Tap early: heel hooks injure before pain
- Knee line first, rotation second
If they grab your heel → Turn toward their knee line, not away
 Heel hook escapeEscape · Leg lock escape · IntermediateFrom Leg lock defense → Passing open guardLachlan Giles · John Danaher · Craig JonesAshi garami escapeEscape · Leg lock escape · IntermediateFrom Leg lock defense, Leg entanglement (Ashi Garami) → Passing open guardSaddle escapeEscape · Leg lock escape · AdvancedFrom Leg lock defense, Saddle (Inside Sankaku) → Passing open guard50/50 escapeEscape · Leg lock escape · AdvancedFrom Leg lock defense, 50/50 → Passing open guard
Neutral 5
Standing
The neutral start. Establish grips, then take them down or pull guard.9 moves · 30 techniquesOpen lessonQuick guide for Standing
The neutral start. Establish grips, then take them down or pull guard.
- Win the grip fight
- Set up your takedown with movement and a level change
- Or pull guard on your terms
- Win the grips
- Change levels before you shoot
If they grab your collar → Break the grip and take your own
 Double legTakedown · Wrestling · FundamentalFrom Standing → Side control (Yoko Shiho Gatame)Stephan Kesting · Chewjitsu · Gordon Ryan · Jason Scully · Tom DeBlassSingle legTakedown · Wrestling · FundamentalFrom Standing, Dogfight, Deep half guard → Side control (Yoko Shiho Gatame)Stephan Kesting · Chewjitsu · John Danaher · Jason Scully
 Ankle pickTakedown · Wrestling · IntermediateFrom Standing → Side control (Yoko Shiho Gatame)Stephan Kesting · John Danaher
 Snap downTakedown · Wrestling · FundamentalFrom Standing → Front headlockJohn Danaher · Stephan Kesting
 Standing arm dragTakedown · Wrestling · IntermediateFrom Standing → Back controlMarcelo Garcia · John Danaher
 Body lock takedownTakedown · Wrestling · IntermediateFrom Standing, Body lock (standing) → Side control (Yoko Shiho Gatame)Gordon Ryan · John Danaher
 Major outer reap (Osoto Gari)Takedown · Judo · IntermediateFrom Standing → Scarf hold (Kesa Gatame)Shintaro Higashi · Jason Scully · Stephan Kesting
 Major inner reap (Ouchi Gari)Takedown · Judo · IntermediateFrom Standing → Closed guard (top)Shintaro Higashi · Jason Scully
 Minor inner reap (Kouchi Gari)Takedown · Judo · IntermediateFrom Standing → Closed guard (top)Shintaro Higashi · Jason Scully
 Shoulder throw (Seoi Nage)Takedown · Judo · Advanced · GiFrom Standing → Side control (Yoko Shiho Gatame)Shintaro Higashi · Stephan Kesting
 Hip toss (O Goshi)Takedown · Judo · FundamentalFrom Standing → Scarf hold (Kesa Gatame)Shintaro Higashi · Jason Scully
 Circle throw (Tomoe Nage)Takedown · Judo · Advanced · GiFrom Standing → Mount (Tate Shiho Gatame)Shintaro Higashi · Bernardo FariaCollar dragTakedown · Wrestling · IntermediateFrom Standing, Seated open guard → Back controlStephan Kesting · John Danaher
 Imanari rollTakedown · Leg entry · AdvancedFrom Standing → Leg entanglement (Ashi Garami)John Danaher · Craig Jones
 Guard pullTakedown · Guard pull · FundamentalFrom Standing → Closed guardStephan Kesting · Chewjitsu · Bernardo Faria · Jason ScullyGuillotine escapeEscape · Submission escape · FundamentalFrom Standing, Closed guard (top), Dogfight → Side control (Yoko Shiho Gatame)John Danaher · Stephan Kesting · André Galvão
 Duck underTakedown · Wrestling · IntermediateFrom Standing, Clinch (collar tie) → Back controlJason Scully · John Danaher
 Fireman’s carryTakedown · Wrestling · IntermediateFrom Standing, Clinch (collar tie) → Side control (Yoko Shiho Gatame)Jason Scully · Stephan Kesting
 Inner thigh throw (Uchi Mata)Takedown · Judo · AdvancedFrom Standing, Clinch (collar tie) → Side control (Yoko Shiho Gatame)Shintaro Higashi · Stephan Kesting
 Knee tapTakedown · Wrestling · FundamentalFrom Standing, Clinch (collar tie) → Side control (Yoko Shiho Gatame)Stephan Kesting
 Advanced foot sweep (De Ashi Barai)Takedown · Judo · IntermediateFrom Standing, Clinch (collar tie) → Side control (Yoko Shiho Gatame)Stephan Kesting
 High crotchTakedown · Wrestling · FundamentalFrom Standing, Clinch (collar tie) → Side control (Yoko Shiho Gatame)
 Sweeping hip throw (Harai Goshi)Takedown · Judo · IntermediateFrom Standing, Clinch (collar tie) → Side control (Yoko Shiho Gatame)
 Minor outer reap (Kosoto Gari)Takedown · Judo · IntermediateFrom Standing, Clinch (collar tie) → Side control (Yoko Shiho Gatame)
 Corner reversal (Sumi Gaeshi)Takedown · Judo · IntermediateFrom Standing, Clinch (collar tie) → Mount (Tate Shiho Gatame)
 Valley drop (Tani Otoshi)Takedown · Judo · IntermediateFrom Standing, Clinch (collar tie) → Side control (Yoko Shiho Gatame)
 Drop seoi nageTakedown · Judo · IntermediateFrom Standing, Clinch (collar tie) → Side control (Yoko Shiho Gatame)
 Russian tie to single legTakedown · Wrestling · IntermediateFrom Standing, Clinch (collar tie) → Side control (Yoko Shiho Gatame)GuillotineSubmission · Choke · FundamentalFrom Closed guard, Butterfly guard, Half guard +4Marcelo Garcia · John Danaher · Chewjitsu · André GalvãoFront headlock escapeEscape · Turtle escape · FundamentalFrom Turtle (bottom), Standing → StandingStephan Kesting · Chewjitsu
Dogfight
Both on your knees from half guard, and you have the underhook. Win the scramble by coming up on a single leg or taking the back.4 moves · 5 techniquesOpen lessonQuick guide for Dogfight
Both on your knees from half guard, and you have the underhook. Win the scramble by coming up on a single leg or taking the back.
- Deep underhook, head up beside theirs
- Come up onto your knee
- Take the back or finish a single leg
- Head position decides the dogfight
- Underhook first, then come up
If they whizzer hard → Limp-arm out and keep driving to their back
Back take from the dogfightPass or back take · Back take · IntermediateFrom Dogfight, Half guard, Half butterfly guard → Back controlStephan KestingDogfight sweepSweep · Half guard · IntermediateFrom Dogfight, Half guard, Half butterfly guard → Side control (Yoko Shiho Gatame)Kimura (Gyaku Ude Garami)Submission · Shoulder lock · FundamentalFrom Closed guard, Side control (Yoko Shiho Gatame), North-south (Kami Shiho Gatame) +5Stephan Kesting · John Danaher · Marcelo Garcia · Jason Scully · Tom DeBlassSingle legTakedown · Wrestling · FundamentalFrom Standing, Dogfight, Deep half guard → Side control (Yoko Shiho Gatame)Stephan Kesting · Chewjitsu · John Danaher · Jason ScullyGuillotine escapeEscape · Submission escape · FundamentalFrom Standing, Closed guard (top), Dogfight → Side control (Yoko Shiho Gatame)John Danaher · Stephan Kesting · André GalvãoClinch (collar tie)
Standing chest to chest with a collar tie or underhook. The fight for head and arm position decides who gets the takedown.5 moves · 12 techniquesOpen lessonQuick guide for Clinch (collar tie)
Standing chest to chest with a collar tie or underhook. The fight for head and arm position decides who gets the takedown.
- Collar tie with your elbow inside theirs
- Head up, forehead to their temple
- Control their other wrist or arm
- Inside position
- Head higher than theirs
If they push into you → Snap down to the front headlock
Duck underTakedown · Wrestling · IntermediateFrom Standing, Clinch (collar tie) → Back controlJason Scully · John DanaherFireman’s carryTakedown · Wrestling · IntermediateFrom Standing, Clinch (collar tie) → Side control (Yoko Shiho Gatame)Jason Scully · Stephan KestingInner thigh throw (Uchi Mata)Takedown · Judo · AdvancedFrom Standing, Clinch (collar tie) → Side control (Yoko Shiho Gatame)Shintaro Higashi · Stephan KestingKnee tapTakedown · Wrestling · FundamentalFrom Standing, Clinch (collar tie) → Side control (Yoko Shiho Gatame)Stephan KestingAdvanced foot sweep (De Ashi Barai)Takedown · Judo · IntermediateFrom Standing, Clinch (collar tie) → Side control (Yoko Shiho Gatame)Stephan KestingHigh crotchTakedown · Wrestling · FundamentalFrom Standing, Clinch (collar tie) → Side control (Yoko Shiho Gatame)Sweeping hip throw (Harai Goshi)Takedown · Judo · IntermediateFrom Standing, Clinch (collar tie) → Side control (Yoko Shiho Gatame)Minor outer reap (Kosoto Gari)Takedown · Judo · IntermediateFrom Standing, Clinch (collar tie) → Side control (Yoko Shiho Gatame)Corner reversal (Sumi Gaeshi)Takedown · Judo · IntermediateFrom Standing, Clinch (collar tie) → Mount (Tate Shiho Gatame)Valley drop (Tani Otoshi)Takedown · Judo · IntermediateFrom Standing, Clinch (collar tie) → Side control (Yoko Shiho Gatame)Drop seoi nageTakedown · Judo · IntermediateFrom Standing, Clinch (collar tie) → Side control (Yoko Shiho Gatame)Russian tie to single legTakedown · Wrestling · IntermediateFrom Standing, Clinch (collar tie) → Side control (Yoko Shiho Gatame)Sprawl (shot defense)
They shoot for your legs and you throw your hips back and down onto their shoulders. Done on time, it turns their takedown into your front headlock or a go-behind.4 moves · 1 techniquesOpen lessonQuick guide for Sprawl (shot defense)
They shoot for your legs and you throw your hips back and down onto their shoulders. Done on time, it turns their takedown into your front headlock or a go-behind.
- Hips back and down as soon as their head drops
- Weight on their shoulders and head
- Circle to their back or clamp a front headlock
- Timing: sprawl when their head drops
- Hips to the mat, not knees
If they shoot a double leg → Sprawl your hips back, crossface and circle behind
Body lock (standing)
Both arms locked around their waist, chest to chest or from the side. One of the safest ways to control a standing opponent: it sets up trips and throws and keeps you out of guillotines.3 moves · 1 techniquesOpen lessonQuick guide for Body lock (standing)
Both arms locked around their waist, chest to chest or from the side. One of the safest ways to control a standing opponent: it sets up trips and throws and keeps you out of guillotines.
- Lock your hands low on their back
- Head tight to their chest or side
- Trip or walk them to the mat
- Your hips under theirs
- Lock low, not around the chest
If they push your head away → Step in and trip them in that direction